CREATING A NEW PATTERN
From the home screen, tap the MENU button to display the menu screen. By tapping the PATTERNS button, it will display all of the patterns stored in the machine as well as providing you some additional options.

By tapping the CREATE NEW PATTERN button, you will be able to access the pattern design screen. At the top you will start by naming your pattern by tapping the small pencil in the lower right corner of pattern name box.

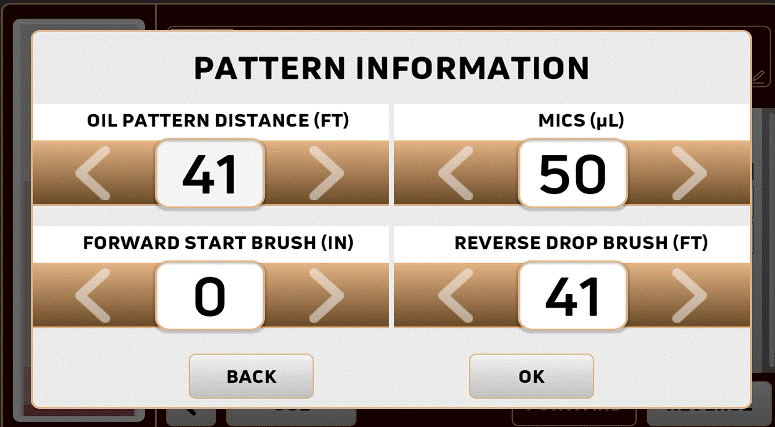
By tapping the FOOTAGE button, you will set the oil pattern distance, mics, forward start brush and reverse drop brush. Use the left and right arrows to make any changes and tap OK or press the BACK button if no changes were made.


By tapping on the FORWARD button, it will take you to the forward load screen. By tapping on the load number you are able to change the starts and stops, loads, mics, drive and buffer speeds. The start distance and the end distance numbers are automatically determined by what is entered into the number of loads and speeds.

Between the start and stop selection there is a lock icon. When the lock is displayed as being unlocked, you are able to change the left start and the right stop separately. With the lock is displayed as locked, the stop board will match whatever you change the starting board to.

The number of loads can be changed by either using the left or right arrows for single increments or tap the number itself and a numeric keypad will be displayed.

The microliters can be changed per load screen by pressing the left or right arrow for single increments or tap the number itself and a numeric keypad will be displayed.
The speeds can be changed by using the left or right arrows to increase or decrease by 4 ips (inches per second). By taping the speed number itself a display of speeds will show. To put less strain on your drive motor, it's good practice to have the machine travel forward and reverse without skipping speeds. For example, go from 10 ips to 14 ips and not 10 ips to 18 ips.
The lane machine has the ability to change the speeds of the Buffer Brush as it travels on the lane. The Variable Buffer speeds range from 50 to 500 and can be changed in increments of 50 rpms. Tap on the arrows next to the buf to change. The left arrow is to lower while the right is to increase the speed. If the bypass is in the on position, the default RPM is set to 500.
Click OK if this screen is complete and go onto forward load screen 2 and so on. When you are finished with all of the forward loads, press the REVERSE button in the bottom right of the screen.
You will enter the reverse loads the same way you did the forward loads. When you get towards the end of the reverse load, make sure you have enough buff area to enter loads. If not, some speeds may have to be changed to allow for all of the loads to be entered.
The CANCEL button will simply erase any changes you made and take you back to the Patterns screen. By tapping on the SAVE button, it will store the new pattern into your list of patterns.

