CLEANER PUMP FAILS TO RUN
- Blown fuse - How to check a fuse
- Cleaner pump motor failed
- Bad connection to motor
- Cleaner pump tubing is need of replacing - How to Article / How to Video
- Calibration is off - How to check Calibration
- Filter in cleaner tank clogged
MACHINE LEAVES LIQUID BEHIND IN VARIOUS SPOTS
- Squeegee needs adjusting, probably needs to be lowered - How to Adjust Squeegee Assembly
- Lane has bad depressions
- Squeegees damaged
- Squeegee needs to be replaced
- Recovery tank not in the machine
- Vac hose has a leak in it
MACHINE LEAVES SQUEEGEE BLADE STREAKS
- Cleaner not mixed properly
- Duster not contacting the lane properly. Make sure nobody reset the number of lanes left in the cloth before its ready.
MACHINE DRIPS CLEANER IN REVERSE
- Squeegee blades not leaving the tailplank of the pindeck
- Squeegee wipe function has been turned off
- Filter in recovery tank is clogged up
- Vac hose is clogged up
- Vac hose has a hole in it
MACHINE PUSHES CLEANER INTO GUTTER AND PINSETTER
- Vacuum hose is disconnected
- Vacuum motor faulty
- Missing recovery tank in the lane machine
MACHINE NOT CLEANING CLOSE ENOUGH TO THE FOULINE
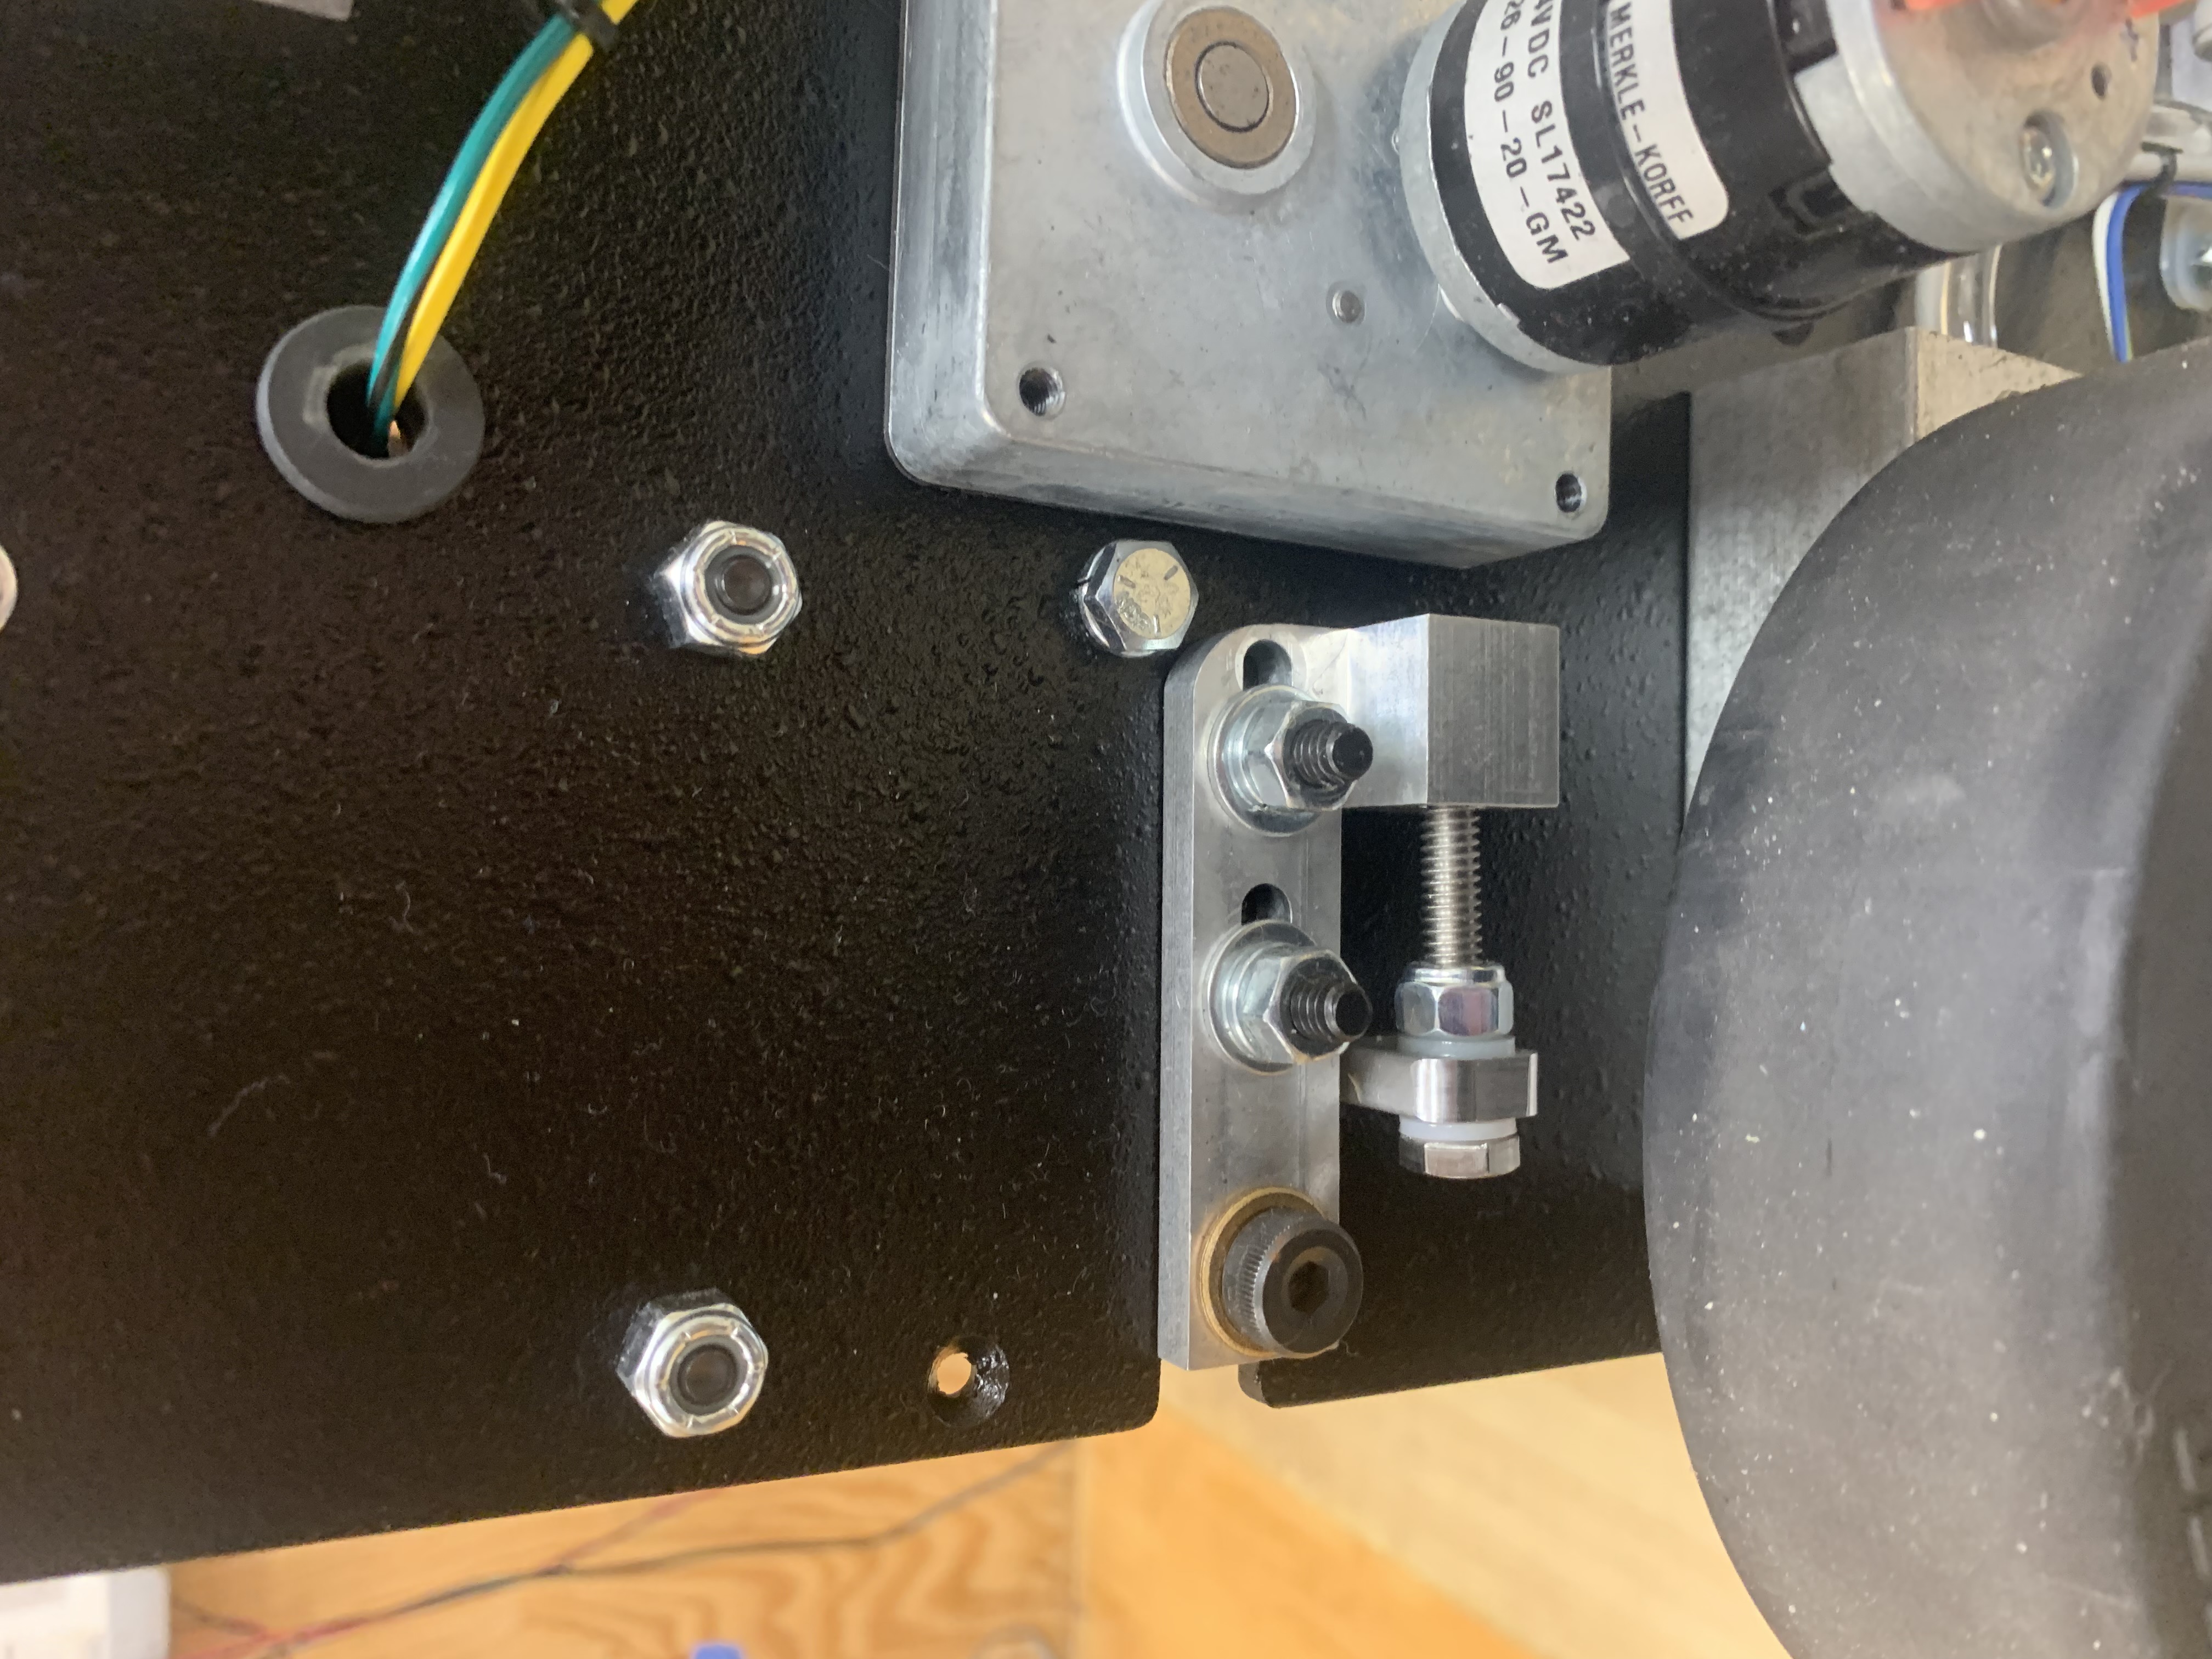
- Check the momentary wheel adjustment
CLEANER CALIBRATION
CLEANER CALIBRATION TEST
In the event a new Norprene tubing has been replaced in your cleaner pump, then a calibration test is needed.
From the home screen, tap the Menu button at the bottom center. This will take you to the menu buttons. By tapping the SETTINGS button this will show you the settings buttons available. Tap the MACHINE SETTINGS button and this will take you to the screen that allows you to test various settings. Tap the PUMP SETTINGS button, this will take you to the screen where you can test either the oil pump or the cleaner pump. By tapping the CLEANER PUMP button, the screen will show the PUMP SPEED and VOLUME.

Before performing your cleaner calibration test, you will need to purge the line by removing the cleaner tip assembly from the cleaner head and place it in the container used for your cleaner waste. By tapping the RUN TEST button, the cleaner head will begin to move back and forth, and the tip will begin dispensing cleaner until the test has been completed. Once the first test has been run in your waste container, you can now run the test in your clean graduated cylinder for verification. Do this more than once to verify the output, thoroughly cleaning the cylinder after each test. You should have a volume of around 30 to 33mls of cleaner.
If an adjustment is needed, go to the PUMP SPEED line. You can adjust the motor speed up or down by using the left and right arrows for single increments. By tapping directly on the number, it will pop up a numerical keypad that you can directly input a specific motor speed.
NORPRENE TUBE REPLACEMENT
CLEANER PUMP TUBING REPLACEMENT
MOMENTARY WHEEL ADJUSTMENT
MOMENTARY WHEELS
To adjust the momentary wheels, stop the lane machine after it has traveled onto the lane approximately 2-3 feet past the foul line. Loosen the two bolts that hold the bracket to the lane machine and raise or lower the bracket assembly until you reach a gap of 1/16" to 1/8" (1.6mm to 3.2mm).
In some instances, you may need to raise the wheel a little higher to clean the front part of the lane closer to the foul line.
SQUEEGEE BLADE ADJUSTMENT
SQUEEGEE BLADES
To adjust the Squeegee Blades, go to the test output screen and lower the squeegee assembly into the down position. Remove both of the side guards and stand the lane machine into the upright position. Take a straight edge and rest one end on the squeegee blades and the other end on the LDS wheel. You should see a gap of 1/8" to 3/16" between the straight edge and the drive wheel assembly.
If an adjustment needs to be made, loosen the two bolts on each side of the lane machine and tighten or loosen the adjusting bolt until the correct measurement is obtained.

External Youtube Video Link - open in new tab
Internal link to a Helpjuice page with a video
