In the event a new Norprene tubing has been replaced in your cleaner pump, then a calibration test is needed.
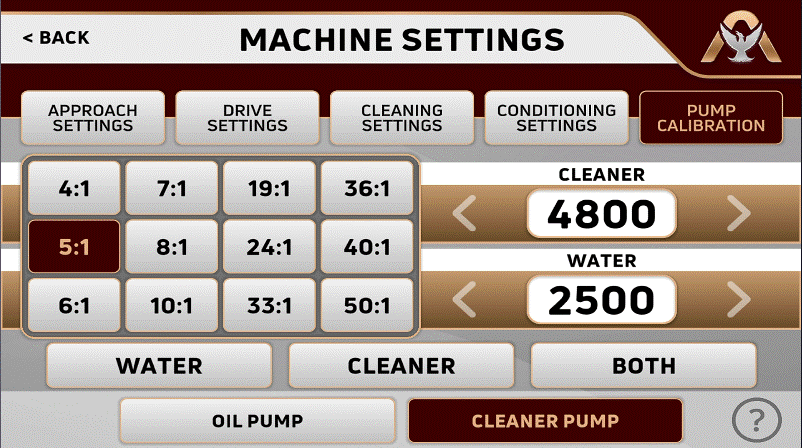
From the home screen, tap the Menu button at the bottom center. This will take you to the menu buttons. By tapping the SETTINGS button this will show you the settings buttons available. Tap the MACHINE SETTINGS button and this will take you to the screen that allows you to test various settings. Tap the PUMP SETTINGS button, this will take you to the screen where you can test either the oil pump or the cleaner pump. By tapping the CLEANER PUMP button, the screen will show the PUMP SPEED and VOLUME.

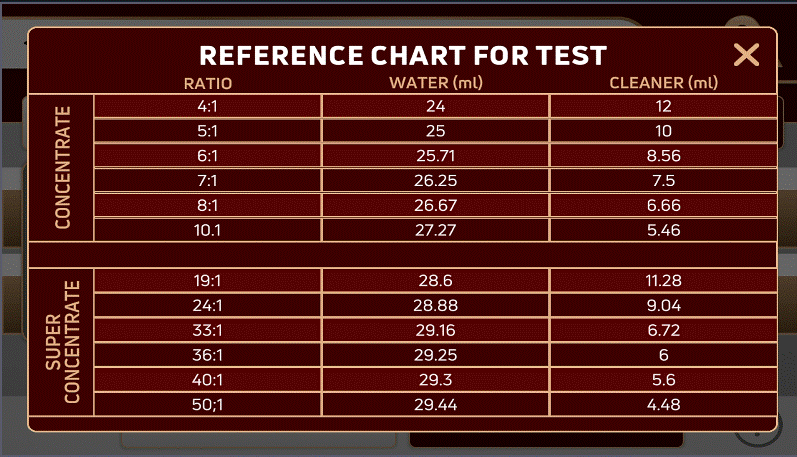
Before performing your cleaner calibration test, you will need to purge the line by removing the cleaner tip assembly from the cleaner head and place it in the container used for your cleaner waste. By tapping the BOTH button, the cleaner head will begin to move back and forth, and the tip will begin dispensing cleaner until the test has been completed. Once the first test has been run in your waste container, you can now run the test in your clean graduated cylinder for verification. Do this more than once to verify the output, thoroughly cleaning the cylinder after each test. By tapping the ratio followed by either the WATER, CLEANER or BOTH button. In the lower right corner is a question mark. By tapping this, the below screen will appear helping you to determine exactly how much liquid should be dispensed.

If an adjustment is needed, go to the PUMP SPEED line. You can adjust the motor speed up or down by using the left and right arrows for single increments. By tapping directly on the number, it will pop up a numerical keypad that you can directly input a specific motor speed.
